14. Everest Cast Widgets
The “Quick Links” feature in the Everest Cast Broadcaster Panel is a utility that centralizes all necessary technical connection information for your station in one easy-to-access place.
It is designed to help you quickly find the information needed to configure third-party software or embed players on your website.
Go to Widgets on left menu and click for a drop down:
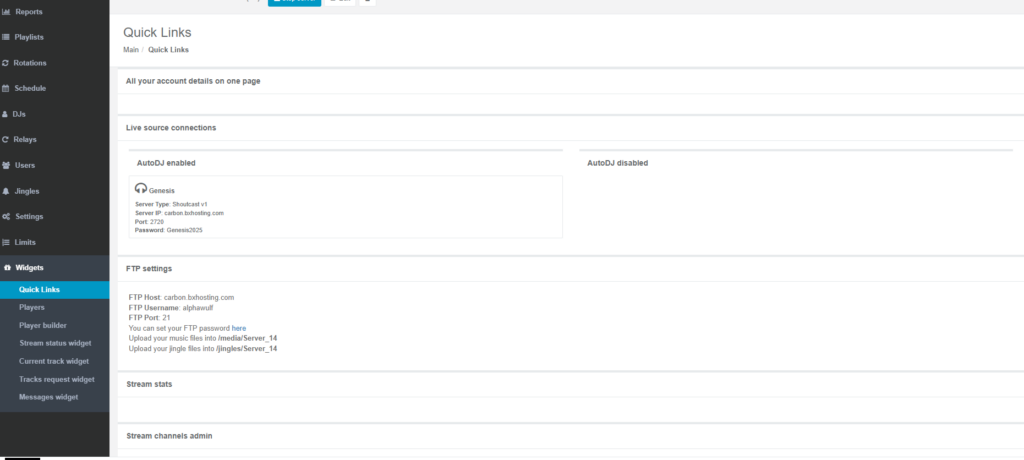
Information Available in “Quick Links”
By clicking the “Quick Links” menu item (usually found under the “Utilities” section), you can access the following details:
- Stream URLs / Listen Links: Direct links that listeners can use to tune in. These might include standard links or HTTPS/Port 80 proxy URLs, which help bypass firewalls.
- Player Links: Specific URLs designed to open the Everest Cast web player in a new browser window.
- Direct Stream Links: The raw, direct links to your Icecast or SHOUTcast server endpoints (e.g.,
http://sourceip:port/stream.mp3). - FTP Credentials: A summary of your FTP login details (Hostname and Username) to upload media files in bulk. Your panel password is also your FTP password.
- Video/Hybrid Stream Links (If Applicable): If your service includes video streaming (Web TV/Live TV), the quick links section will also provide direct M3U8 and RTMP links for those streams.
This section essentially consolidates various technical links that are otherwise scattered throughout different settings or widget pages.
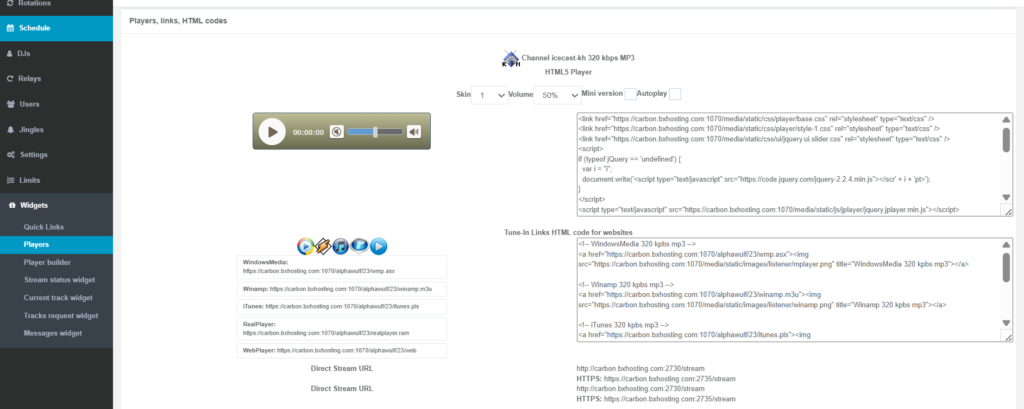
Players
Everest Cast supports several options for listeners to tune in, ranging from simple direct links to customizable embedded web players.
1. Embedded Web Players (Widgets)
The primary way broadcasters offer a player to their audience is by generating an HTML5 web player widget in the control panel and embedding it on their own website.
- Customization: The “Widgets” section allows you to customize the look of the player (colors, size, cover art display) before generating the unique HTML code.
- Dynamic Information: These players can automatically display the “Now Playing” track information, album art, and current listener counts.
- Compatibility: Everest Cast players are designed to be compatible across various devices, including Android, iOS, laptops, and more.
2. Direct Listen Links (M3U/PLS)
Everest Cast provides simple, direct links that listeners can open in a third-party media player software like Winamp, VLC Media Player, or iTunes.
- Access: These links are found in the “Quick Links” or “Widgets” section of your panel.
- Formats: You can usually obtain
.m3uor.plsplaylist files or direct stream URLs that point straight to your SHOUTcast or Icecast server IP and port.
3. Third-Party Platforms
Everest Cast integrates with external platforms to broaden your reach:
- Simulcasting: You can configure Everest Cast to simulcast your audio stream to platforms like Facebook and YouTube.
- Smart Speakers: You can configure your station to be available on devices like Amazon Alexa.
- Radio Directories: By configuring the advanced settings, your station can be listed in public streaming directories, making it accessible through thousands of internet radio apps and devices.
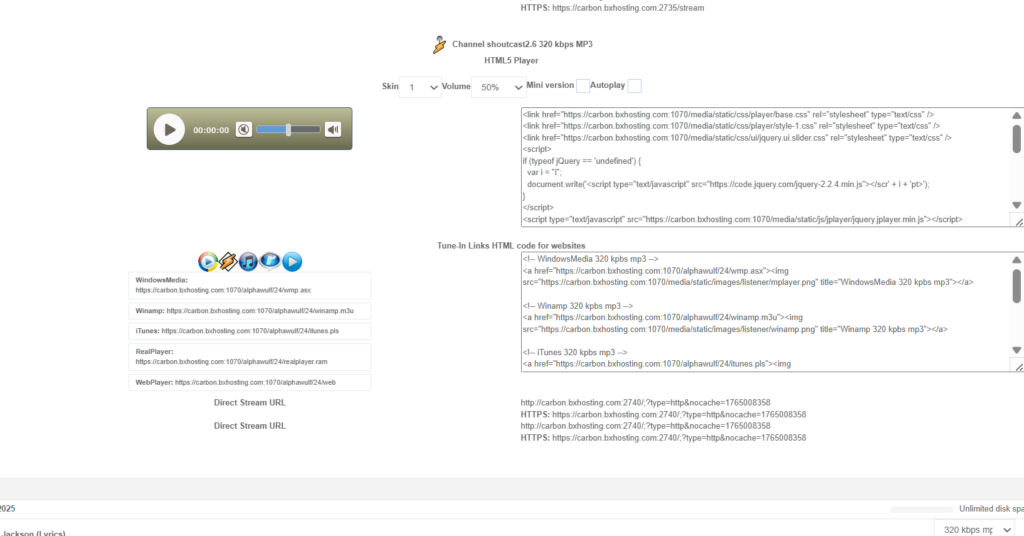
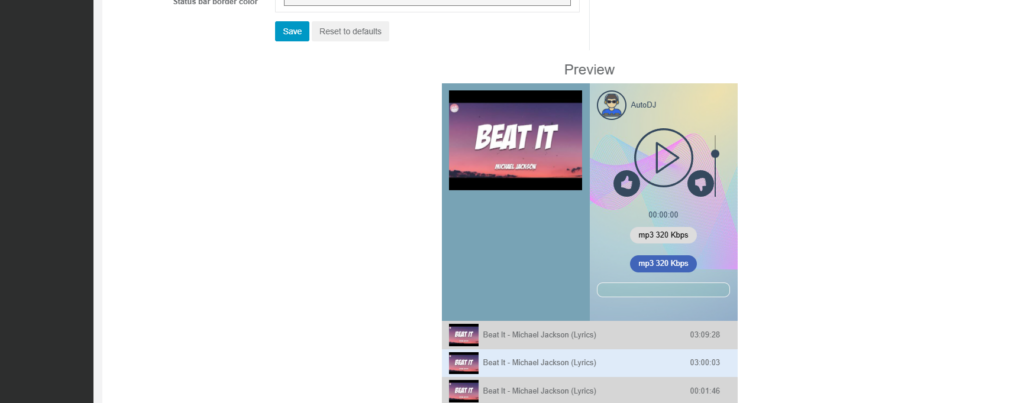
Everest Cast provides a built-in “player builder” feature within the control panel’s “Widgets” section. This tool allows broadcasters to customize and generate an HTML5 web player for their website.
How to Use the Player Builder
The player builder is an interactive interface where you configure the appearance and functionality of your embedded radio player.
Navigate to the “Widgets” menu item in the left-hand navigation.
- Select the “HTML5 Player” or “Web Player” option.
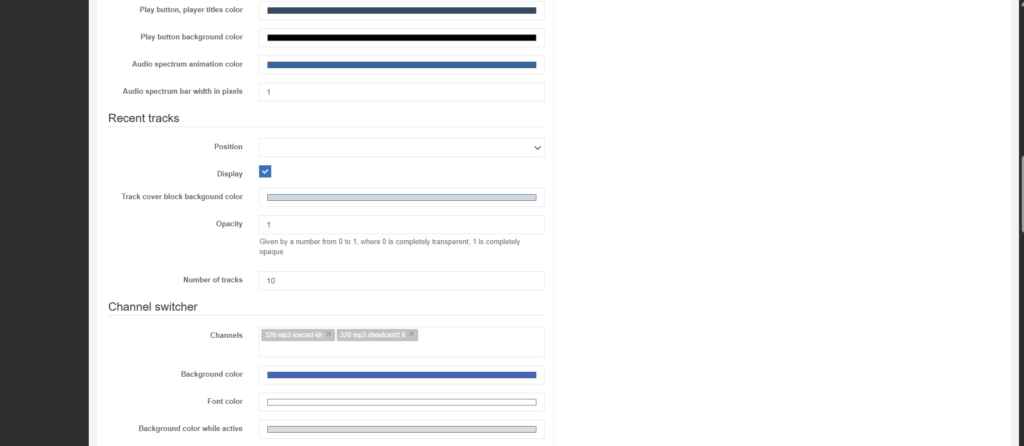
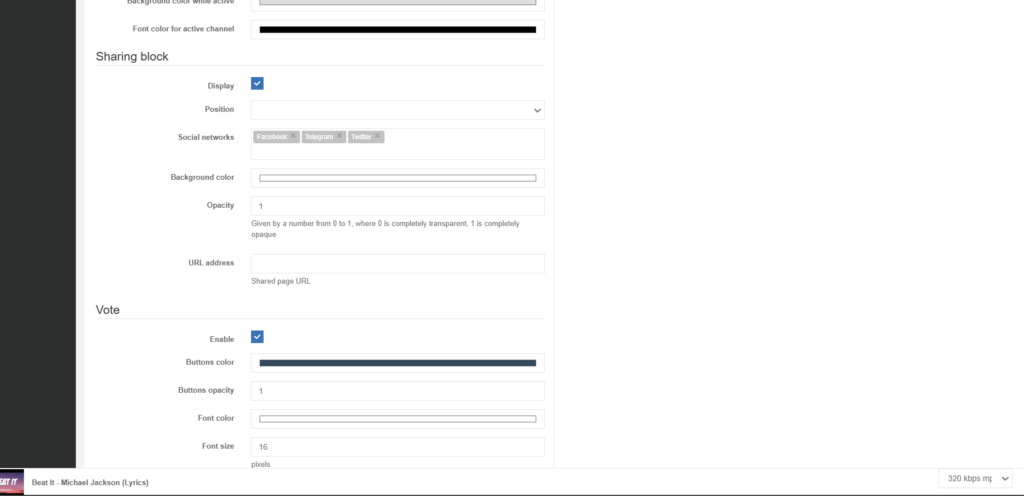
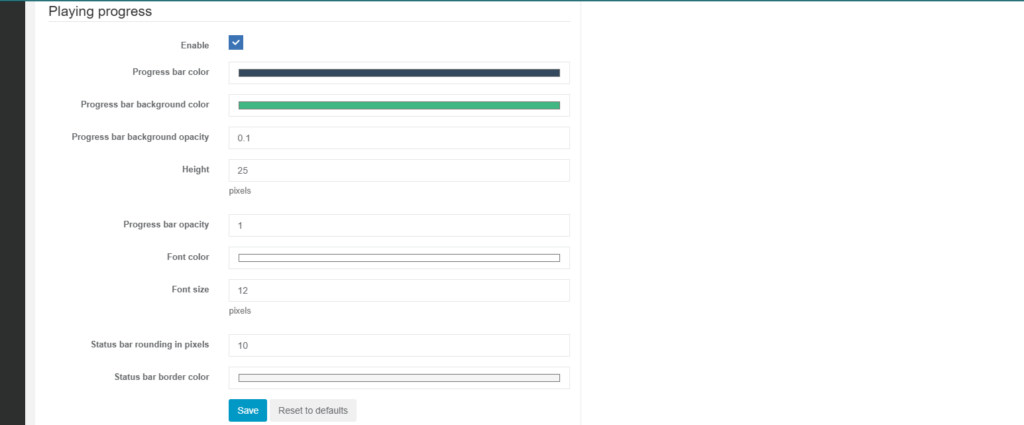
Customization Options
The player builder interface typically offers several options to match your website’s branding:
- Appearance: Choose colors, themes (light/dark), and overall size/layout.
- Information Display: Select whether to show the “Now Playing” track title, artist name, album cover art, or current listener count.
- Functionality: Options may include enabling a volume slider, play/pause buttons, and a “like/dislike” voting system for tracks.
- Channel Selection: If you have multiple channels (different bitrates/formats), the builder allows you to specify which stream the player should connect to.
Once you have configured the desired look and feel, the tool automatically generates the necessary HTML code that you simply copy and paste into the source code of your website.

The Stream Status Widget
is a versatile tool in Everest Cast designed to display real-time information about your radio station on your website. It is one of several customizable widgets available in the Broadcaster Panel.
What the Widget Displays
The Stream Status Widget typically shows the following information dynamically:
- Current Track Title: The artist and title of the song currently playing. Note that tracks must have the “artist” and “title” meta tags set correctly to show up properly.
- DJ Name: If a live DJ is connected and the setting is enabled, it displays the name of the active DJ.
- Current Listeners: The real-time count of people tuned into the stream.
- DJ’s Avatar/Image (Optional): The DJ’s image can also be displayed next to their name if configured in the DJ settings.

How to Use the Stream Status Widget
- Log in to your Everest Cast Broadcaster Panel.
- Navigate to the “Widgets” menu item on the left.
- Select the “Stream Status Widget” from the list of available options.
- Customize the widget’s appearance, size, and which specific details you want to show or hide.
- Copy the generated HTML code.
- Paste the HTML code into the HTML source of your website where you want the status information to appear. The widget will automatically update its content as your station broadcasts different tracks or switches between AutoDJ and live DJs.
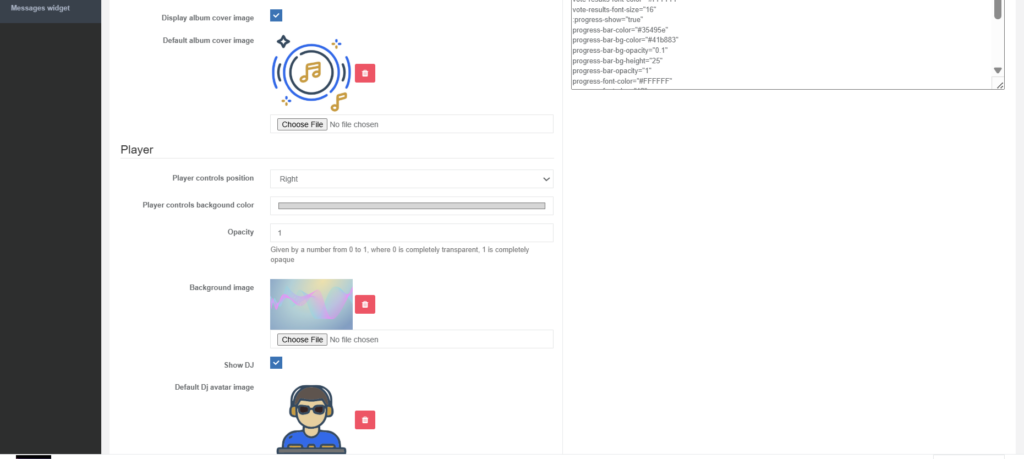
The Current Track Widget
is one of the most used features in Everest Cast, designed to dynamically display the artist name, song title, and cover art of the music currently playing on your station.
How to Find and Customize the Widget
You can build and customize this widget using the built-in tool in the panel:
- Navigate to the “Widgets” menu item on the left.
- Select the “Current Track Widget” option from the list.
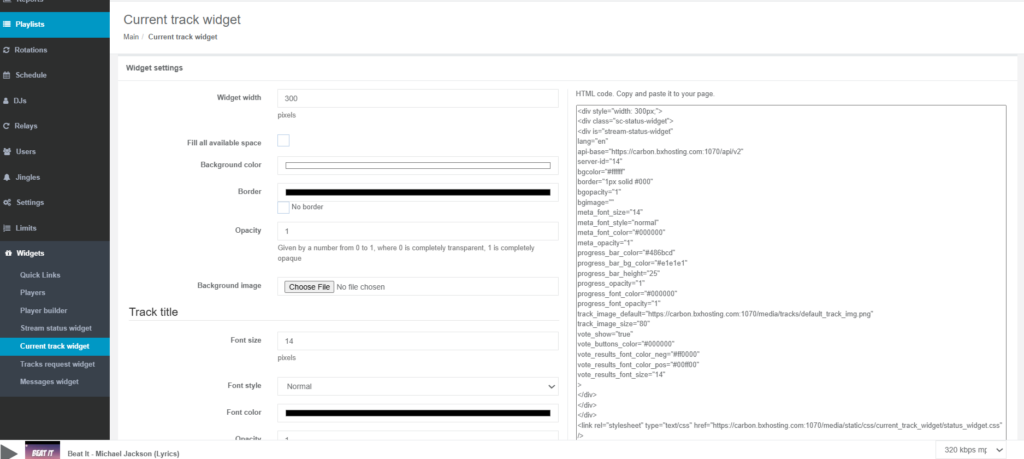
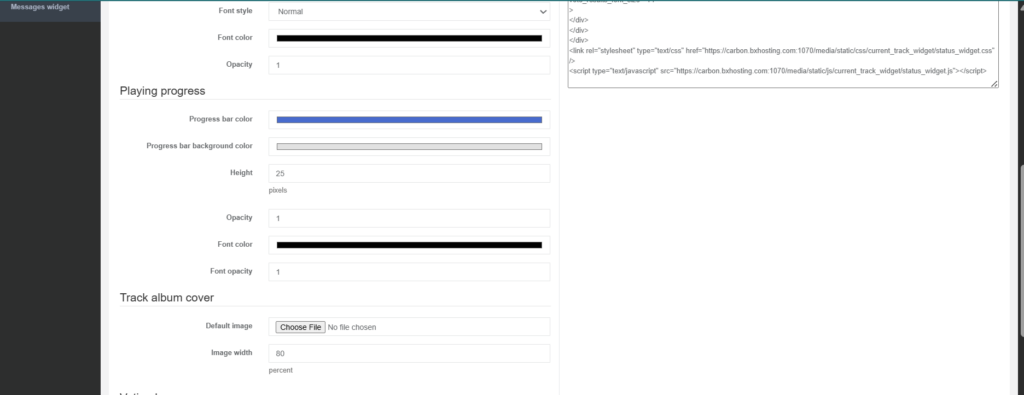
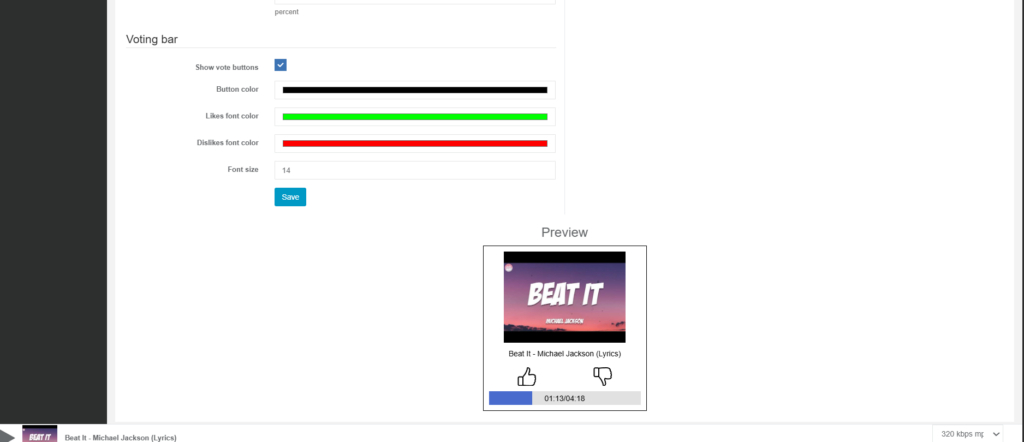
Key Features and Customization
The widget builder lets you tailor the look and behavior to match your website:
- Dynamic Metadata: The widget automatically updates in real-time when the song changes, pulling metadata directly from your stream source.
- Album/Cover Art: You can enable or disable the display of album cover art (images must be embedded in your audio files or sourced online).
- Voting System: A popular feature allows you to include “like” and “dislike” buttons on the widget. Listener votes are recorded in your “Top Tracks” reports, helping you gauge popularity.
- Customizable Appearance: You can change border styles, colors, and fonts to integrate the widget seamlessly into your web page design.
- Integration with Requests: The widget can also display “shoutouts” or messages from listeners who submitted a song request via the Request Widget.
Implementation
Once you configure the options and click Save, the panel generates the corresponding HTML code. You simply copy this code and paste it into the HTML of your website.
Important Note: For tracks to show up correctly, they must have the correct artist and title meta tags embedded in the audio file metadata.
The Track Request Widget
in Everest Cast allows your website visitors to search your station’s music library and submit song requests, which are then automatically queued for playback by the AutoDJ.
How to Implement and Configure the Widget
The process involves both setting up the widget appearance and configuring the AutoDJ behavior.
1. Configure the Widget’s Appearance
You use the built-in player builder to customize the look of the request interface:
- Access: Navigate to the “Widgets” section in your panel menu and select “Track Request Widget”.
- Customization: The interface allows you to change the colors, size, font, and button styles to match your website’s theme.
- Generate Code: Once customized, the panel provides you with HTML code to copy and paste into your website’s source code.
2. Configure AutoDJ Request Settings
You must define the rules for how requests are inserted into your programming queue:
- Access Settings: Go to the main “Settings” menu in your panel.
- Request Interval: Find the “Listeners track requests” section. Here you define how many normal tracks should play before a requested track is inserted into the queue (e.g., “play every 5 songs”).
- Metadata Display: You can customize the “Now Playing” message that appears when a requested song plays, often using placeholders like
[Requested by %PERSON%: %MESSAGE%]to show the listener’s name and message. - Request Limits: You can set rules to prevent the same listener from spamming the system with requests in a short time frame.
3. Designate Requestable Tracks
By default, not all tracks may be requestable. You need to explicitly allow certain songs:
- Go to “Home” menu and select “Requestable tracks”.
- Use this list to enable or disable the request feature for individual songs or entire playlists.
- Note: Tracks must have correct Artist and Title metadata for the system to match requests successfully.
Once set up, the widget provides a powerful, automated way to engage your audience and let them influence the playlist.
The Messages Widget,
often referred to as the Shoutouts Widget in Everest Cast, displays real-time messages that listeners submit along with their song requests.
This provides an interactive element for your website, allowing your audience to communicate with you and each other.
How the Messages Widget Works
- Listener Submits a Request: A listener uses your “Track Request Widget” to select a song and types in a personal message or “shoutout” in the accompanying text box.
- Message Storage: Everest Cast stores this message temporarily on the server.
- Widget Display: The Messages Widget embedded on your website continuously pulls these stored messages and displays them, often in a scrolling marquee or a list format.
- Metadata Integration: When that specific requested track plays on air, the “Now Playing” metadata for the track can be configured in the Settings menu to display the listener’s name and message (e.g.,
[Requested by John Doe: Happy Birthday!]).

How to Implement the Widget
- Navigate to the “Widgets” menu item on the left.
- Select the “Messages Widget” or “Shoutouts Widget” option.
- Customize its appearance (colors, size, display speed if scrolling).
- Copy the generated HTML code and paste it into your website’s source code.